Tuesday, December 18, 2007

Painted Batting


I have been experimenting with painting quilt batting. It is an idea that I have been tossing around after painting on dryer sheets and paper towels, and the recent article in Quilting Arts Magazine gave me the push I needed to start. I am a longarm quilter and I have oodles of batting scraps laying around that I cannot bear to throw away, and I have been using it to make fabric postcards, but have not made a dent it them!

These two experiments use diluted acrylic craft paint, that I slopped on with a foam brush. The orange set are less diluted than the greenish set. The wider pieces are Warm and Natural, and the skinnier pieces are Quilter's Dream Select Cotton. The QD paints more uniformly, the scrim on the W&N seems to interfere with the absorbtion of the paint, and leaves a texture, though I'm sure that feature could be used to an advantage. In this cold weather, they are taking a LONG time to dry, but are very quick to paint.

I am planning on incorporating them into my art quilts. The nice thing about batting is that it doesn't fray, it has dimension and body, and would create a lovely texture as a top element, and is easy to hand stitch through as well as machine stitch. Try it and show me what you've done!

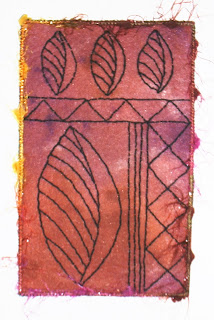
Friday, December 7, 2007

Abstract African Fabric Postcards


More postcards--surprize! These are a set that I make for the Abstract Fabric Postcard swap that I hosted on my Latest Trends in Mixed Media group. I made my second set with African inspired fabrics and embellishments.

Saturday, December 1, 2007

Doodling Designs Class


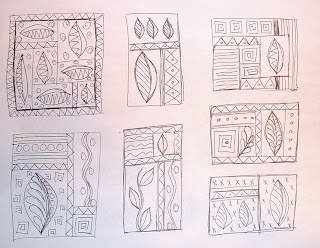
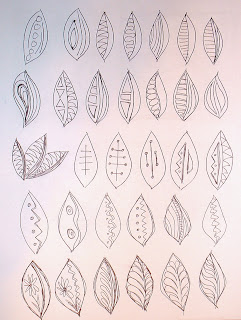
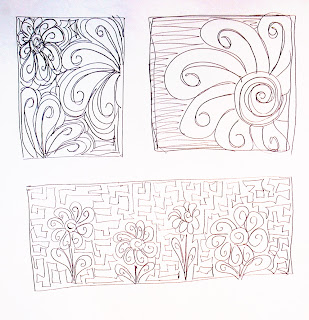
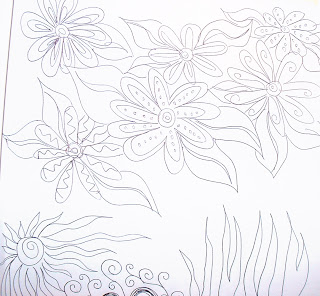
I am taking an online class at www.joggles.com called Doodling Designs with teacher Susan Sorrell. I am way behind on lessons, but these are some doodles and the project for the first lesson. I am not much of a "doodler", I feel like I am trying to hard to "draw" instead of just let the flow of the doodle come. Too much of a control freak probably! I am anxious to go through the next lessons, it just might take me some time. Stay tuned....

Saturday, November 17, 2007

Auction Quilt


I have been working on a quilt for the major fundraiser for my daughter's school. Two other moms and I pieced the blocks, and I quilted it on my longarm machine. The auction is tonight, so I am keeping my fingers crossed that it will raise a lot of money for the school! We are very happy with it. Now I want to make one for myself!

Thursday, November 8, 2007

Blog Neglect


Oh, I have been neglecting my blog! I have been busy with several projects, and will post pics soon, but meanwhile here are a couple of postcards that I have recently made.

The first is a Dia de los Muertos (Day of the Dead) card that I did just for fun with this cool fabric (Alexander Henry?) that I got on Shop Hop last year. I used a silk flower that was recycled from a broken lai that my daughter had.

The second postcard is a challenge piece that I did for the Habiliments yahoo group. The theme was "My Home is my Nest", and so this depicts my home in New Mexico, using the rich colors of the Southwest. The bird is a bead taken from an old clay necklace, and I wrapped some vine twigs from our yard with one of my favorite fibers to make the nest.

More pics coming soon, I promise!

Wednesday, October 10, 2007

Abstract Fabric Postcard


These are some fun abstract fabric postcards that I made for a swap and challenge on the Latest Trends in Mixed Media group that I am a co-moderator for. I made them with some of the left overs of my handdyed fabric from the Melody Johnson workshop that I took last spring, plus some other balis, and decorative yarn. These are so addictive. There is still time to join the challenge and swap if anyone is interested, you can find the details on the LTMM group.

Saturday, September 29, 2007

Blast From the Past--Paper Bead Jewelry


Found a box in the garage this week full of some of the paper bead jewelry I had made about 17 years ago! I knew it was around here somewhere. It is kind of fun and funky, but I don't know that I could pull off wearing it anymore! Some of it will probably end up on my Etsy store. These are just a few of the sets of earrings. I also found some bracelets, anklets, and necklaces, and I will post more later. Except for the pink leaf ones,these are made with ribbon or handmade newspaper beads that were painted, and some had more painting details like dots added. Brings back memories!

Sunday, September 23, 2007

Sunprints

These are some of the sunprints that I did this summer. The top two were made, not with real leaves, but with little leaf masks that I found in the clearance section of Hobby Lobby. They are usually used for faux finishes. They worked great for the sunprints, and I can use them over and over again. The third sunprint was made using the kids' foam stickers in flower and leaf shapes. I bought them for myself , but the kids think I bought them for them, and I am borrowing them. The last sunprint was made by placing a sheet of plastic needlework canvas over the fabric, and it made an interesting grid design. You can really put just about anything on the fabric when making sunprints. I have even seen washers and pasta sunprints.

I used diluted Seta-Color paints on all except the second one, on that one I used fabric dye. I tried to make some more sunprints this week, but it was too windy, and the wind kept blowing all of my leaves off! So, sunprinting season might be over for this year.


Saturday, September 22, 2007

3 x 3 Butterfly Collage


This is the last of the 3 x 3 inch collages that I did for the Collage Compostition group swap. I painted and stenciled the background with blue and copper, then added layers of papers and hand colored butterfly image. I added little brads in the corners--I really love those little brads to add a little dimension--I am almost out of them! The collage is coated with glossy Mod Podge. I just bought the matte Mod Podge, because I am not sure that I like the glossy finish, so I will experiment with that at some point.

To me, this collage symbolizes "Breaking out of the square". I have noticed in the past year or so that I am such a "square". I like things at right angles to eachother, and I like squares more versus circles or triangles, or other shapes. I don't really mind being a square, I just think that it is kind of funny that things seem to turn up square for me. So, this butterfly is breaking out of the square! We'll see if it is a sign for things to come....

Thursday, September 13, 2007

Love Those Blogs!

I finally got around to adding some of my favorite blogs. I will be adding more in the future, as I find all of the little scraps of paper that I write them down on! Take a look, and prepare to be inspired!

Tuesday, September 11, 2007

Giant Dragonfly!


I have been fascinated with dragonflies as of late, and the other day came upon this giant one perched on the top of a hollyhock. I ran inside to get the camera, not really expecting him (or her) to still be there, but stay he did for about an hour. I was able to get some nice shots of him that might in one way or another show up in future art.

Friday, September 7, 2007

I am a Red Crayon

You Are a Red Crayon

Your world is colored with bright, vivid, wild colors.
You have a deep, complex personality - and you are always expressing something about yourself.
Bold and dominant, you are a natural leader. You have an energy that is intense... and sometimes overwhelming.
Your reaction to everything tends to be strong. You are the master of love-hate relationships.

Your color wheel opposite is green. Green people are way too mellow to understand what drives your energy.

Wednesday, September 5, 2007

Collage 3x 3 inches

These are two collages that I am doing for a swap on Collage Compositions. They each measure 3 x 3 inches. The colors turned out a little funky in the photo--I had trouble taking a pic, because I sealed them with Glossy Mod Podge, and kept getting a glare, so these pics were taken outdoors without the flash, but the colors got funny.

Anyhow. The Asian one was made by stamping on a red texture painted background with the Chinese Characters. Then I sewed on pieces of brown paper bag that I had crumpled and highlighted with gold metallic paint. The flower image was printed out, painted, and colored with pencils, and finally I glued on the Chinese Coins.


On the flower one, I painted several layers on the background, stenciled the blue squares, stamped the green daisy--which by the way I found out that the ink isn't permanent and runs with Mod Podge--so I had to spray seal it with Acrylic spray before I did the decoupage. Then I added the words which were printed and lightly painted, plus the flower image.

I am finding that I tend to work a little on the minimalist side, I just didn't want things too cluttered, but I hope that my work is not mistaken for lack of effort--these took me Forever putzing around with them! I am working on a 3rd set, but the images are fighting me, so I don't know if I'll get them done. I love doing the backgrounds, and playing with the different techniques, but then I get stuck on the composition. I guess that is why I am in the Collage Compostition group, huh?

Tuesday, August 28, 2007

Fabric and Paper Beads

These are beads that I made for a swap on Art Techniques.

For the fabric ones, I painted the red silk type fabric with a little bit of copper paint and then wrapped with copper foil. The blue ones were wrapped with "Razzle Dazzle" thick decorative thread.


The paper beads were cut into long triangles and wrapped. The blue ones started off as a peach floral scrapbooking paper, and I paintedthem by rubbing dimensional paint on them.


The red ones were newspaper that I painted with red acrylic and then wrapped with copper wire.


Friday, August 24, 2007

Katie Pasquini Masopust Workshop

I took a fabulous workshop last weekend with Katie P-M, "Color and Composition for the Creative Quilter", based on her book by the same name. It was just wonderful. We did a 3 day workshop in only 2 days, so the pace was fast, but well worth it.

We started by doing some drawing exercises with a fruit or vegetable still life, and then worked them into a free-motion machine quilting exercise and a cropped Acromatic and Monochromatic composition.


These were 3 of one of my favorite exercises using line and compostition:


And finally, a free cutting compostition, based on a photograph. We had to use an Analogous color scheme in colors that were different from those used in the picture. This was a tropical scene in blues and greens. Gives a very different feel than using true colors.
Katie gave us lots of useful information on composition and color schemes, and some great exercises to get the creative juices flowing. Can't wait to spend some studio time developing what I learned!

Tuesday, August 7, 2007

Do You UHU?

UHU sent me one of their Glue Rollers to try out and review. I had heard about it from Maria's blog here: www.mariafilosa.com where she has lots of great projects and tips about using UHU. I had actually never used a UHU product or a glue roller, but now I am hooked. The glue comes out the end in little tacky dots as you roll the tool along paper or whatever you are gluing. For a while, I wasn't sure what to use it on, and then one day, I was working on fabric postcards, and I needed to tack down the fabric postcard top to the cardstock that I use for the backing so that the top wouldn't slip around when I sewed the edges. I had been using glue stick or double stick tape for this, but glue stick can be messy or goopy, and the double stick tape is kind of a pain. So, I thought of the UHU Glue Roller. A few quick rolls in the corners, and it was glued down for me to do my stitching! Easy and mess free. I have since had it sitting out on my drafting table, and use it often for attaching postcard backs, ATC backs, collage work, and more. It is so handy!

Asian Leaf


I did this for the Habiliments group challenge this month, using a reoccurring image in my art--a leaf. I began by pulling out my purple scrap bin, laying out different pieces to get an idea of color placement, and then began to sew thebackground together--half preplanned, half improvised. Then I appliqued the leaf using one of my hand dyed fabrics (that I am nolonger saving for special--I am using them!) I tore 1/2 inch strips of a lovely hand dye that I bought from a friend of mine--I only have a fat quarter, so it is coveted, but perfect for this. I tore the strips because I like the soft raveled edge that it created, andI appliqued these with a straight stitch. I made the beads on the left with fabric strips wrapped with a piece of copper (made for stained glass). The edge is couched with olive green yarn.

What's Black, White and Yellow?


ATCs of course! These are my latest set of ATCs for the Sky's the Limit group. The theme was black, white and one color. The flowers were "borrowed" from my daughters broken lai necklace--I had to do it when she wasn't looking or she'd throw a fit--she already caught me in the act a few weeks ago. I also added little paper flowers and brads, beads and a yarn edging.

Red Ocean Painting

This is my first attempt at painting with acrylics in over 15 years. I just joined a yahoo group that is going to be working from the book "Acrylic Revolution" by Nancy Reyner. I just wanted to dabble a little bit with the paint before we got going. I feel totally out of my element, but it was fun to push the paint around the paper. This piece turned out totally different than planned--it started off being vertically oriented, and then this ocean reflection revealed itself, so I went with it.

Thursday, July 26, 2007

Parfait Dyeing and Paper Towels Too

Here are the results from my dyeing playday last week.

This top picture is of the washed fabric that I dyed in the "parfait" fashion. I am happy with how they came out, though next time might use more concentrated dye to get darker colors. This one, believe it or not, is a dyed paper towel! It really looks like fabric. I will use it for mixed media art pieces. The fun thing about paper towels is that they can be sewn like fabric, but also torn, decoupaged, etc and used like paper too.

Another paper towel. This one was wet when I hung it to dry, so the dye started to gravitate down--I like the effect.
Stripey paper towel.
Donna B. mentioned the idea of "wicking" a paper towel roll, so I had to try it! I set a roll of paper towels in a plasic bin, and kept adding a little bit of dye in the bottom of the bin, and let it soak in. It only wicked about 1/4 of the way, so I turned it on its other end, and repeated the process with a different color. Again, it only soaked up about 1/4 of the way, so I cheated and poured the third color directly to the middle of the roll. I let it "soak" overnight, and then unrolled the paper towels on a sheet of plastic to dry outside. This is what they looked like as they came off the roll. So now I have a lifetime supply of orange, blue purple, and magenta paper towels! I want to try it again with some different colors.