Saturday, August 22, 2015

Sun Inspiration Doodle Designs

I have noticed this Sun theme popping up over and over again in my art over the past couple of years. I love to doodle with a brush and india ink on large(r) sheets of paper, like 18 x 24 inches, to get my creative juices flowing. I try not to overthink as I am putting brush to paper, but just focus on filling the page with brush strokes.  I work as fast as I can, intuitively, and that helps me from getting stuck on what to do next...Just Do It!

One of these sun doodles translated to the sewing machine. I used the same concept of filling the wholecloth muslin and doodling using black thread on my sewing machine to emulate the black brush strokes of the india ink.  Later, I colored this piece in with crayons and acrylic paint. This quilted piece measures about 18 x 18 inches.

And then look: in one of my recent ceramic pieces, here is that sun ray motif again, or perhaps it is a sunflower?  I made a clay slab bowl, and then incised the design into the clay. I highlighted it with black glaze to make the line work pop.


Tuesday, August 11, 2015

Ceramic Bowls and Vases

I am continuing to play with ceramics, making bowls and vases. I love doing the surface design on the bowls with either dimensional glazes and/or painting designs onto the pieces. 

The vases were made using texture stamps in the clay to create the design--I am using the green one to hold my paint brushes--much more decorative than the tin can I used to use!


Thursday, July 2, 2015

Ceramics!

Last semester, we did a project with ceramics, making a food dish/ platter that had meaning to our family traditions. I chose to make this tortilla holder in honor of my Mexican heritage, that we had tortillas with our holiday meals and I remember my Grandma Josephine making the BEST hand made tortillas!

This summer, since I am not able to take classes, I decided to do some "home schooling".  I have been playing around with clay, the textures that I can make in the clay, and the beautiful glaze colors.  Of course, I love jewelry, so I have been making some focal pendants as well as buttons. Small bowls are also a favorite--coming up soon in a blog post.


Tuesday, April 28, 2015

Escher Style Tessellation

We have been learning about tiling and tessellations in my Geometry for Design class--right up my alley with my quilting background. But specifically, I have been fascinated with M.C. Escher's tessellations. I made about 10 different prototypes out of regular colored paper, and then selected one that I wanted to turn into a painting for my final project.

This shape started with a 90-degree triangle. I traced the shape out repeatedly onto a piece of 15 x 20 illustration board, and painted in the shapes with turquoise, teal, orange and red.


I then developed the design further by drawing the lizard figure and leaves with black charcoal.  Put a final coating of spray clear acrylic, and voila--my first tessellation!!!

Monday, April 27, 2015

Final Project Fail and Success

I have been working on my final project for Art Practices II--the assignment is to explore Time Based Media.  So, this could include a performance piece, something that is an installation like an ice sculpture that melts away, or an event that the artists creates (and may or may not participate in).  So, less about the art piece, and more about what happens over the time of the art process--kind of hard for me to explain.

Anyhow, we had watched a video about the recreation of a giant ice block wall installation (can't remember the artist's name now...), and it was a pretty neat project.  An 8 foot high, 4-sided wall, that took 30 people to create.  And then it melted all away....

I liked the idea of the melting ice, but wanted to have something tangible remain at the end. Have the melting ice make the art (kind of reminds me of snow or ice dyeing).  I put liquid watercolor paints into ice cube trays and froze them. Then set them out on watercolor paper and filmed them melting. 

The first two experiments were Epic Fails!  On this one, the colors were too concentrated, and just made mostly black. I used salt to make an interesting design element, but that part didn't really work either.  


On the second sample, I diluted the colors, but they didn't really flow or absorb into the watercolor paper like I was hoping.  


The third sample (not shown) worked out better, because I switched to using fabric instead of paper. The paper just wasn't absorbing and moving the colors the way I wanted.  The third sample was OK, but I tweaked it a bit more and got this one--Success!  I filmed for about 2 hours, and will speed up the footage and set to music.


Saturday, April 25, 2015

Block Party! Geometry Style.

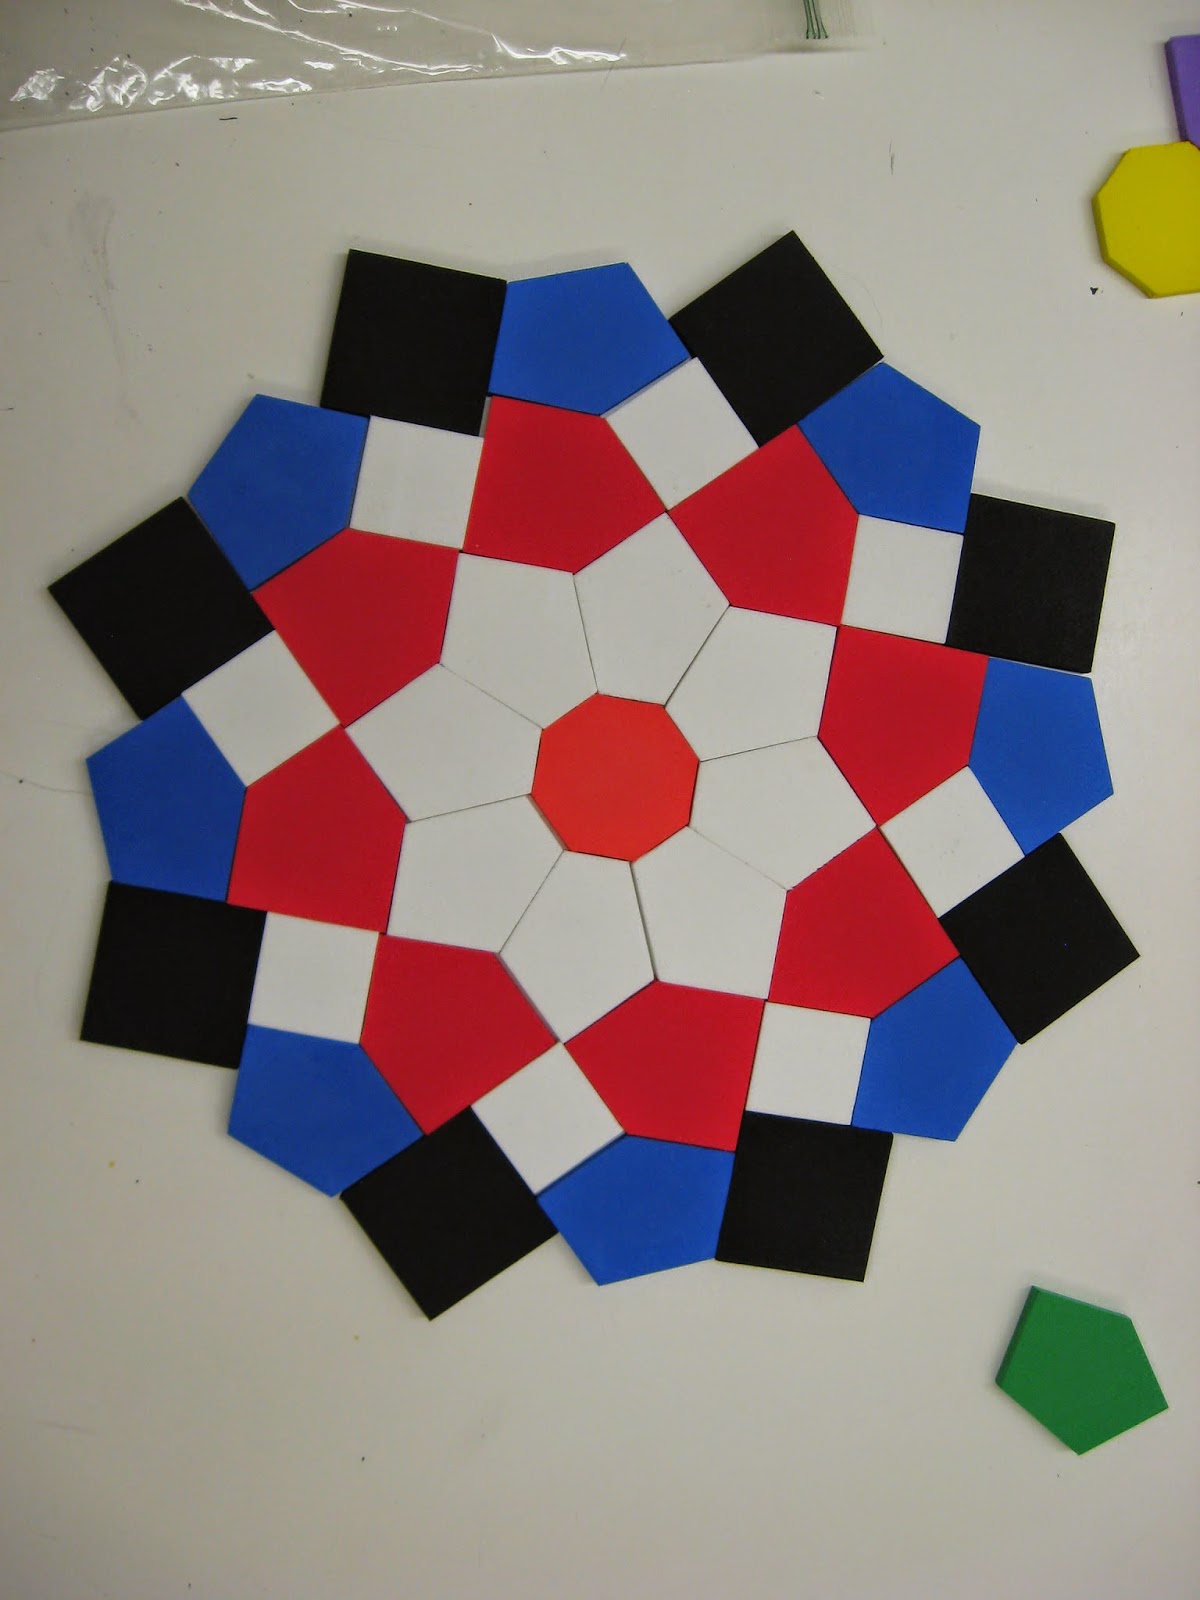
In my Geometry for Design class, we had a "Block Party" a couple of weeks ago. Basically, my professor, Peter Steinbach, supplied several different kinds of foam, plastic, and wood blocks, based on different Tiling Systems--from different cultures, using different angles--, and let the class have at it!  This worked out perfectly, because it was the day that two of my children came to school with me because they were on Spring Break.

We were able to arrange the blocks into whatever designs we wanted. It was a lot of fun to be able to work hands on, and see how the shapes fit together. This also blended in perfectly with my quilting background, and there are several designs that I would love to turn into quilts one day.

It was so funny, part way through the class my 4-year old asked, "When are we going to go to your REAL class?". I guess he thought this was too much fun to actually be a college class. My 12-year old daughter said that she wanted to go to college now too!  Yes, kids, college can actually be fun!


AccessorTrees

My take on Accessories for Trees:


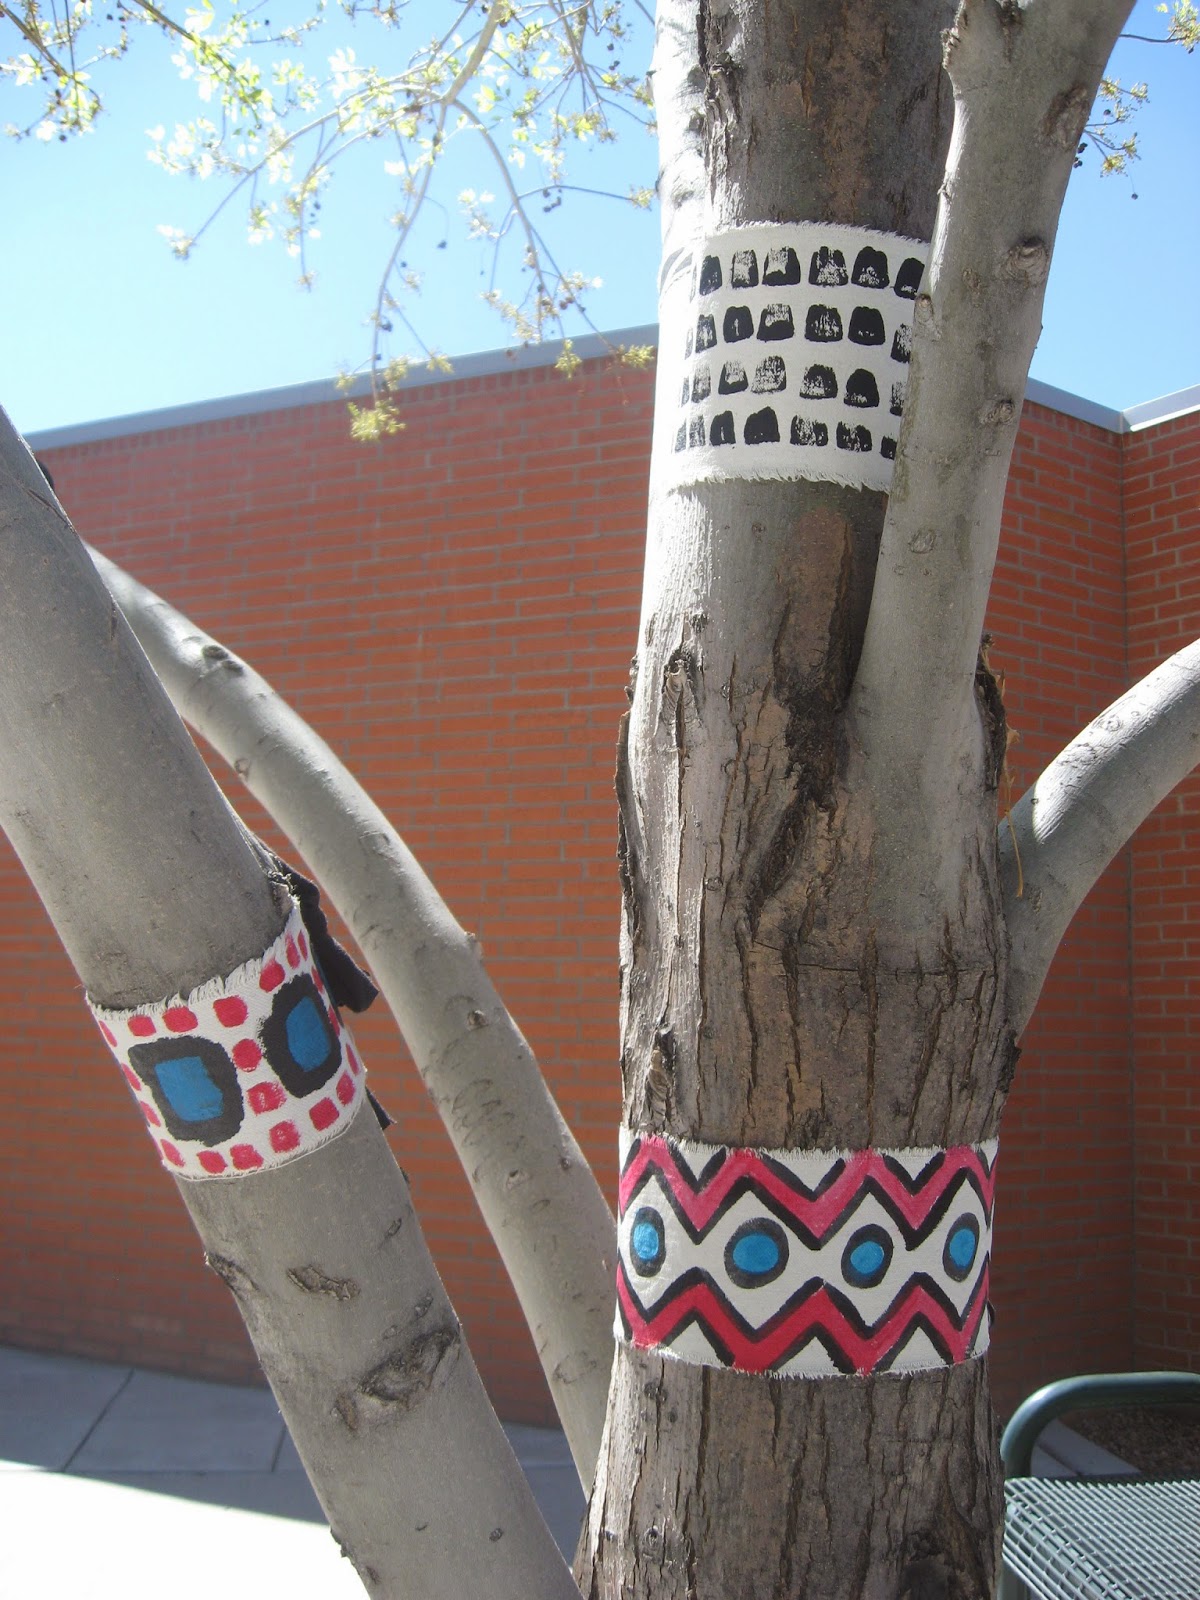
One of our assignments for Art Practices II was to create an installation piece. I walk past a series of 5 trees on my way to class, that seemed to be screaming to be decorated in some fashion. But, the trees are natural, earthy, and didn't want to be garish. So, I had to come up with a way to add some subtle accessories that the trees would be comfortable wearing.

I decided to paint imperfectly geometric designs onto raw, torn edged canvas. I used a limited palate of paints. Black (because everyone looks good in black), red to complement the trees' green hair, and turquoise to bring out the color in their eyes. I measured each trunk and branch to size the belts and bracelets properly, and then tied them on with strips from black recycled shirts.

I love the way they came out, and it is fun to sit and watch other passersby reactions to the art. I hope the trees enjoyed wearing them!

Friday, April 24, 2015

My First Ukrainian Egg

I took a workshop tonight at CNM Community College with instructor Lynn Johnson to learn how to make Ukrainian Eggs. Too much fun!  This workshop was offered through the CNM Art Club, which I just discovered, and is a great resource. They have more workshops scheduled this summer, and you can bet I will be there!

To make the Ukrainian Eggs, you use beeswax as a resist to draw a design on the egg, and then dip into a dye to color the unwaxed areas.  Much like you would do when drawing with a white crayon on an Easter Egg. Then you add more wax over the areas that you want to keep the first color, and dip it again. Repeat the process until the egg is complete, and then carefully melt the wax off.  Pretty simple process, but it was difficult for me to get my lines straight! That will take some practice!

Here is the egg after doing yellow and brick dye dips:


And here again after I dipped into Turquoise, which became a very rich brown since it was dyed over the brick color.  These three pictures are different angles of the finished egg. Definitely something I would like to try again.  And the beeswax smells so good!


Monday, April 20, 2015

When you give a 4 year old your camera.....

My kids had to go to school with me a couple weeks ago when they were on Spring Break and I wasn't.  This worked out pretty well, because we had a "Block Party" in my Geometry for Design class, so we literally got to play around with blocks all day (images of that to follow in a different post),  I had brought my digital camera to document some of our block designs, and of course, Fletcher grew bored in my class pretty quickly and wanted to snap some pictures. I love this "selfie"--perfectly illustrates the Mad Man inside the cutie 4 year old!


I was going through the pictures when I uploaded them to my computer, and began deleting the super blurry ones, but these two caught my eye.  He snapped these outside after class:

 Isn't it funny how kids are so captivated by their own shadows?  And this one really captures a beautiful silhouette.


I'm not even sure what this is....I think it is part of a seating bench outside the classrooms.  But I love the grid and the grid shadow underneath.  From this perspective, it almost looks like a grate going up the side of a building, but I am pretty sure it was a bench.

I think I need to give Fletcher the camera more often and see the world through his eyes!

Thursday, March 5, 2015

Simon Beck's Snow Art

I actually did this little write up below for my Geometry For Design class, but thought I would share on the blog too, since it is definitely art related. Funny, I had seen his work a few years ago, and thought "cool", and then went on with my life. Now that I saw it again while I am taking the Geometry class, it resonates so much more, since now I know how to draft some of the designs he uses!  Pretty cool when things happen in the right place at the right time.

The other night, while watching the Science Channel, I saw a short blurb about a man named Simon Beck, who makes giant “snow art” by making footprints artfully arranged in the snow.  An engineer, turned cartographer, Simon creates huge pictures in the snow, often very geometric (rather than free form) designs, and executes them with mind blowing precision. How does he do this on such a grand scale, using only his feet as the drawing tools? 

With Geometry of course…. and a compass. 

He figures out his designs based on a circle (360 degrees) and then uses a compass (360 degrees) to keep himself on track as to which direction on the circle to walk. He paces out the steps to determine the length of a given line, and repeats the same pace in multiple directions according to his design.


This example features the isosceles 60-degree triangles.  The triangles are resized and repeated, and filled in with more footprints to create the "shading".  His designs can take up to 12 hours to complete, and he can walk as much as 25 miles to make one drawing.  Pretty amazing application for Geometry!

Wednesday, March 4, 2015

I Am For An Art

Over 50 years ago, Claes Oldenburg first composed his "I Am For An Art..." statements. You can read more about that here

I used to compose haiku as I was trying to drift off to sleep--something to distract my mind from all of the stresses of the day, and to take my mind off of the endless "To Dos". Now, I have been finding myself composing "I am for an Art" statements instead. They are quirky and fun, and a great way to engage my mind to get to sleep. Here are a few of mine. Please share some of your own in the comments!

I am for an art exploding with color like a rainbow on acid.
I am for an art that sticks with you like a piece of popcorn stuck in your teeth.
I am for an art that washes over you like a tsunami.
I am for an art that breaks through the clouds like the sun on a rainy day.
I am for an art that holds you with suspense and curiosity like a train wreck.
I am for an art that brings a breath of fresh air, like the scent of Glade in a stinky bathroom.
I am for an art that satisfies like a good scratch behind a cat's ear.
I am for an art that is as crazy as a lunatic who escapes from a mental asylum.

Tuesday, February 10, 2015

Pursuing An Art Degree

I don't think I've mentioned this on my blog, but I am currently pursuing a degree in Fine Art at CNM (Central New Mexico). 

I have a B.A. in Anthropology from UNM, with a minor in Studio Art, and for many years, I wish that I had gotten the art degree instead. So, last Spring, just about a week after my 40th birthday, I took my first class toward this goal!  The kids think its kinda funny that I am going to school, VOLUNTARILY, and as my 9 year old son said, "And you've got to PAY for it too?"  Too funny. But I also think that it is a good example for them, to show them that it is never to late to follow your dreams, to value education and life long learning, and that it takes hard work to achieve your goals.

This semester I am taking 9 hours/ 3 classes. It is a lot to do, plus working to support myself and my kids, and to have any time to clean the house or relax.  But, I am loving it!  I am taking Art Practices II (a studio course), Geometry For Design and Art Career Concerns. More about the classes later.

As I am reevaluating my artistic life, I am realizing what an important tool blogging is. I used to blog very regularly, and really enjoyed it. I love to be able to share my work, to see what other people are doing, and to be part of the online art community. Blogging also helps me to organize my own thoughts, and is a great record of where I have been artistically.  I dropped off for a couple of years due to personal complications (new baby, divorce, move, etc.) and it took me awhile to get my Art Mojo back.  Well, it is back. And I will be sharing a lot more on my blog!

I am also fighting FEAR of posting my art (soul) publically.  And fighting FEAR of being IMPERFECT (see the post a couple of weeks ago).  But many times, I feel the urge to blog about something, and then chicken out because I don't have a good picture, or the artwork is unfinished, blah, blah, blah.....excuses. So, I will try really hard to do my best, but not let FEAR of any kind hold me back!

So, to get the party started, here are a few pictures of little miniature watercolors I have been playing with. They are 3 x 4.5 inches.  I just started doing them in December, and gave a bunch away as Christmas presents. They are a great way to get my "art fix" before bed, and don't take much time at all to do. Hope you enjoy!


Friday, January 9, 2015

Fab Fabric Bowls

I made a couple fabric bowls years and years ago, and finally got around to making them again after being inspired by some I saw last weekend. After many hours of wrapping 1/2 inch wide fabric strips around cording, and only about 20 minutes per bowl sewing, I have my first 2 bowls! 

Sorry for the crummy pics--can't find my digital camera after our trip for Christmas, so snapped these with my cell phone. Better IMPERFECT than not doing it at all, right? 

Maybe I'll try some coasters next, or even an area rug?  Great way to use scraps!